
Last September I wrote this blog entry describing how to implement API testing using a combination of Python and Behave.
In this new post, I would like to describe how I also use Postman to test APIs. Postman is a Google Chrome app which we typically use to quickly test APIs to see the returned results. Postman is a powerful HTTP client that allows us to test complex HTTP requests in order to validate the responses to make sure they retrieve the right information. Using Postman allows us to request data and get the responses in a friendly GUI.
Postman has several methods to interact with endpoints, these methods are:
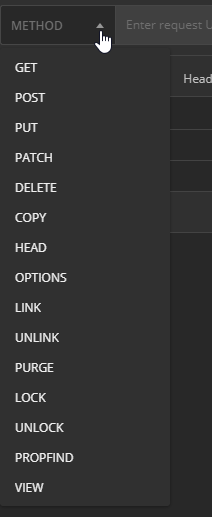
I am not going to explain all of them, I just want to explain those that are best used when testing an API, they are:
● GET -> fetch information
● POST -> add new data
● PUT- > replace all the existing data
● PATCH -> update some existing data fields
● DELETE-> delete existing data
Let me begin by explaining how to create a collection in postman. Collections allow you to group individual requests together, and it helps to organize them into folders.
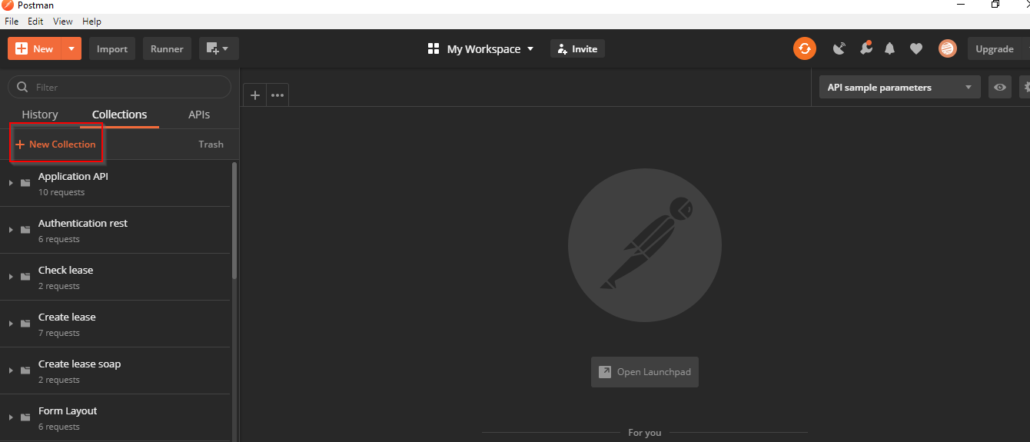
So, our first step is to create a new collection, we can name it “jsonplaceholder”, which will be displayed in the left panel. The next step is to create our first request. For this example, we are using the jsonplaceholder endpoints that are open to play with its services.
To create a new request we follow these steps.
- Right click on the collection created, select “Add Request”
- Enter a name like “Consume jsonplaceholder”, then click on “Save to jsonplaceholder”
- Click on the request displayed under the collection we have created.
- Make sure the “GET” method is selected
- In the field “Enter request URL” please enter -> http://jsonplaceholder.typicode.com/posts
- Click on “Send” button
At this point we have created our first request, and receive our first response from the endpoint with a list of posts and a Status code of 200. We should receive a similar response to this screenshot.
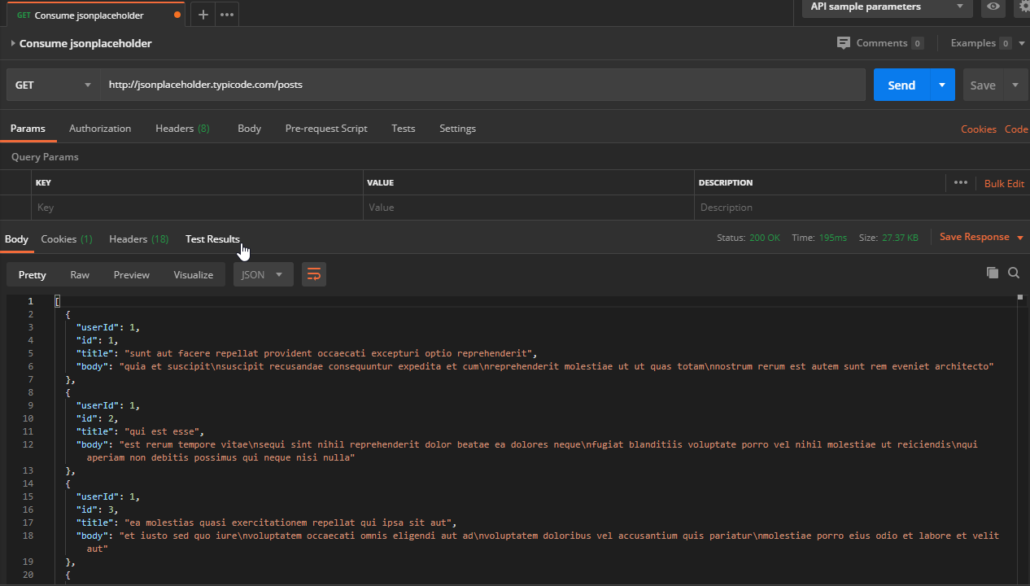
When we validate responses, we should make sure the json retrieved is the expected one, with the right forma and status code; and check the time it took to receive an answer.
Now that we are able to get information from and endpoint, we can attempt to store some data to an API. For this we would need to use the “POST” method. We create by following these steps:
- Right click on the collection created, select “Add Request”
- Enter a name like “Add post”, then click on “Save to jsonplaceholder”
- Click on the request displayed under the collection we have created.
- Click on method dropdown, select “POST”
- In the field “Enter request URL” please enter -> http://jsonplaceholder.typicode.com/posts
- In “Body” section, please enter the following json body:
{
“userId”: 4545,
“id”: 101,
“title”: “This is an example”,
“body”: “some information”
} - Click on “Send” button.
Once the request has been processed, a 201 Status code (Created) is displayed as a response as well as the endpoint will retrieve a json response with the id that belongs to the post we have created in the system.
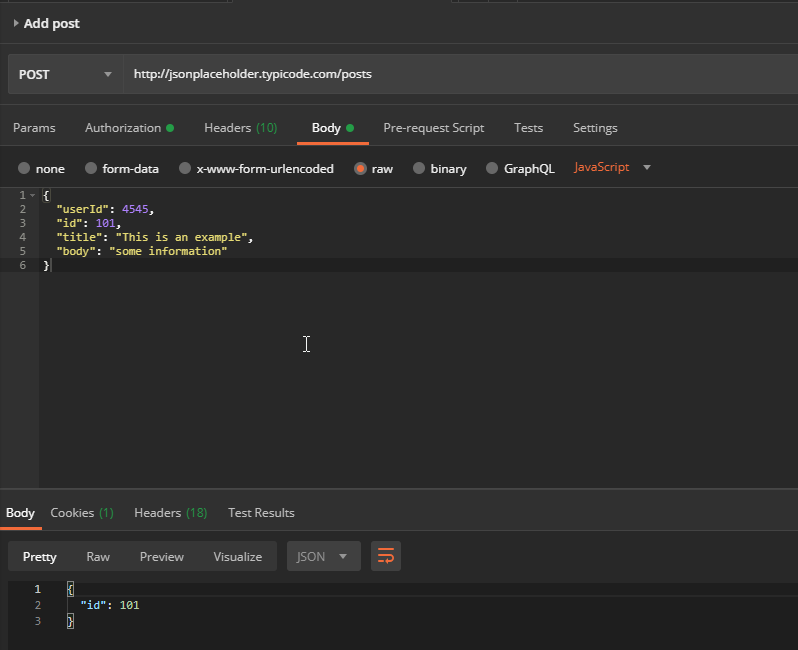
As you can see, testing APIs using Postman is not complicated. Postman also offers some interesting additional features. For example, it allows us to create environments.
What is the environment?
Basically, it allows to run requests and collections against different data sets. It means we can have an environment for Prod, another for Testing and another one for development. An important fact of using environments is that we can store variables that will be used in several tests. For example, let’s imagine we need to authenticate to and endpoint before calling any other service, the authentication endpoint will retrieve a token that needs to be sent to each request since it is required to get a response; the token can be stored in a variable that will be passed to each test.
How to create this environment and variables?
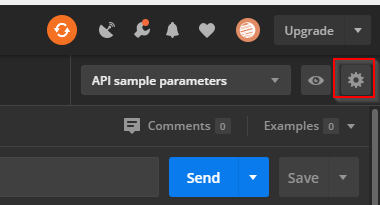
- In the right corner of Postman we can see a “configuration” icon
- Click on “Add” button. Please add an environment name like “Testing”.
- Under “VARIABLE” enter “url”.
- Under “INITIAL VALUE enter “http://jsonplaceholder.typicode.com”
- Click on “Add” button.
At this point we created a new environment as well as a variable called “url. Probably, you are wondering what is the purpose of it? Lets modify our tests that we created before in order to use the variable we have set. Open both requests and replace the url we have for this -> {{url}}
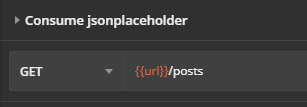

As we can see, we are using the same variable in two different requests, so let’s click on “Send” for both requests, the same responses from the previous execution will be reflected.
Postman also allows us to create variables either in Pre-request Scripts or Tests according to what we need. Here is how to save a specific value from the json response in a variable that we would need in another request. In order to save a value in a variable we should follow these steps:

- Click on “Tests” tab.
- Please enter the following code:
var post_id = JSON.parse(responseBody);
pm.environment.set(“post_id”,post_id.id);
- Click on “Send” button.
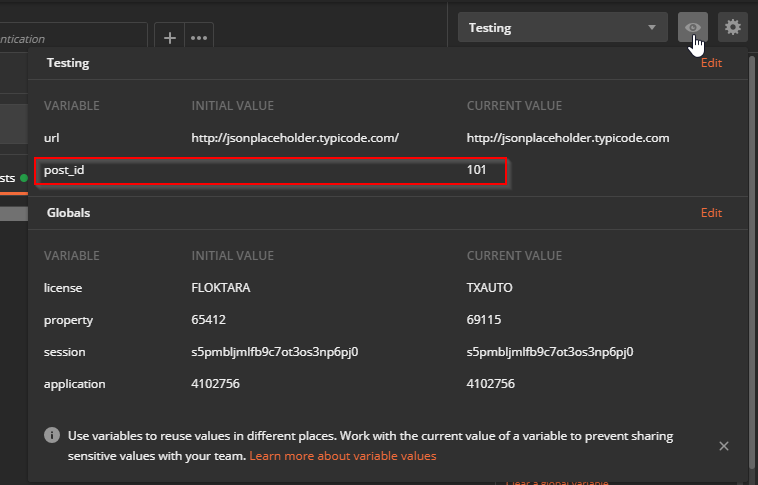
Here we have created a new variable, in order to see this variable, we can click on “configuration” icon next to the “Testing” environment. A modal will come up with the new variable created, each time we call this endpoint, that variable will be overridden with the new id it gets as response.
Postman has become one of the most useful tools for API testing since we can create very powerful tests that can even assert data. If you are considering beginning testing API testing, you can easily research this tool to discover all the advantages it can bring to your project. In this blog, we learned how to get up and running with testing HTTP API endpoints with Postman, how to save variables and create environments. By using Postman, you can make your team and your development workflow more productive by reducing the time spent on testing and sharing API specifications and endpoints. This is especially important when working in an Agile team environment.

 SIgn up