
 by: Jason Campos – Senior QA Engineer – GlobalNow IT
API testing is an important component in a company’s QA strategy since their client’s often consume the API endpoints to get the necessary information for execution of the business. In most cases, manual testing is initially performed at the most important endpoints to ensure the customers retrieve the information needed; followed by automation of the test scripts for daily execution using Continuous integration.
I recently implemented test automation for a client’s REST API; using Python + behave as the primary framework, and I would like to share my experience and techniques used for this automation project.
Why did we choose Python + behave?
- Setup and cleanup is easy when configuring a project due to the functions and feature offered by behave
- Behave is popular with Python BDD practitioners.
- Behave is based on Gherkin that makes it easier to understand the functions of a test, even for people without programming knowledge.
- Adequate Tutorials and guides are available online that help with understanding and research
- Python needs less resources than java, it has better performance.
- Python typically needs less code than Java to create a framework
- Python is a dynamic language, with Java you must declare types to data.
- Python is easier to be used/learn compared with Java
I compared Python with Java above because most of the frameworks in automation projects are written in those languages; and for this project our development team has ample Python resource.
Implementation Techniques:
Let’s start creating a basic framework.
Prerequisites
We would need the following programs installed:
- Python 3.x
- Behave (pip install behave)
- PyCharm or any python IDE
Setting up our environment
First, we need to create a project with the following folder structure,
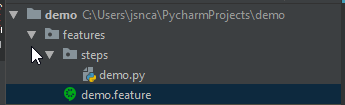
A brief explanation about the folder structure:
features folder -> when behave runs, it looks for the features folder, here is where the tests are going to be located, each .feature class could have many tests/scenarios to be executed.
steps -> each .feature class should contain a .py class inside steps folder, there is where the logic of the test will be located.
demo.feature -> behave class that contains the scenarios and test to run using Gherkin syntax
demo.py -> Contains all the python logic to call the endpoint and verify its response.
Time to write our first test
In Pycharm, open demo.feature, then write the following line:
Feature:(REST-API) Get from mock rest api a json response
This is the feature description, here we can explain what is the purpose of this. When we have a big system, we are going to have many features.
The next line we would need to add is the Scenario to test, so we need to add:
Scenario: Fetch from a mock rest api a json response
Now, we have to add three phases of behave (“Given”, “When” and “Then”), I am going to explain the purpose of each of them, Given is the incharge of preparing the request data like URL, headers, body request, etc, When is going to execute the request and Then verifies the response. This demo.feature class looks like:
Scenario: Fetch from a mock rest api a json response
Given the mock url
When we consume the endpoint
Then json response is retrieved with right data and 200 as status code
At this point we are able to open a cmd, move where the feature folder is located in the project is located and enter behave in the cmd, we are going to get a response like:
Feature: (REST-API) Get from mock rest api a json response # features/demo.feature:1
Scenario: Fetch from a mock rest api a json response # features/demo.feature:3
Given the mock url # None
When we consume the endpoint # None
Then json response is retrieved with right data and 200 as status code # None
Failing scenarios:
features/demo.feature:3 Fetch from a mock rest api a json response
0 features passed, 1 failed, 0 skipped
0 scenarios passed, 1 failed, 0 skipped
0 steps passed, 0 failed, 0 skipped, 3 undefined
Took 0m0.000s
Writing our steps:
All steps are written in Python, they are linked between the descriptive test in .feature and the application code using the behave tags behave (@given, @when and @then). We need to open the demo.py file and add the following imports:
from behave import *
Once we have added the import, we need to use the behave annotations to write python code each step will execute, we would need to add @given + the description we added in the demo.feature class for given tag in our demo.py class as follows:
@given(‘the mock url’)
def step_impl(context):
context.url = “https://jsonplaceholder.typicode.com/todos/1”
This code will prepare the url to be consumed. The next step is to implement the @when tag, this is going to be in charge of calling the endpoint using requests library, for this, we just need this code:
@when(‘we consume the endpoint’)
def step_impl(context):
context.response = requests.session().get(context.url)
The above code is going to call a mock RestAPI, the response of it is a json and 200 as status code. Finally, when the request has been done, our last step is to validate the response, here we have to implement the @then. The json response the mock RestApi retrieves is:
{
“userId”: 1,
“id”: 1,
“title”: “delectus aut autem”,
“completed”: false
}
Using python code, what we need to implement to validate the response is:
@then(‘json response is retrieved with right data and 200 as status code’)
def step_impl(context):
assert context.response.status_code == 200, “Response code is different: %s” % context.response.status_code + \
” Error: ” + str(context.response.content)
json_response = context.response.json()
assert json_response[‘id’] == 1, “Data is not the expected one: %s” % json_response
In this last step, we have a couple of asserts, the first one validates the status code is 200 which means the request was processed by the server, the second assert validates the id in the json response has the expected value.
At this point we have created a basic framework to run a simple test, in order to execute it we just need to open a cmd, move to features folder where the project is located and run behave command, the results will look like:

As you can see, behave is very simple to use, with just these few lines of code we were able to write a basic framework that will work for RestApi testing, behaves also gives us some other nice characteristics that you can review in this link https://behave.readthedocs.io/en/latest/tutorial.html that are helpful for more complex environments and scenarios.
Conclusion
This blog walked you through setting up a new project with the Behave library and python for Rest-Api testing that will allow you to create your scripts to test the main endpoints and increase coverage in your QA process.

 SIgn up